Blackstar Amp No Sound [Reason & Fix]
Music has the power to transcend boundaries and evoke emotions that words alone cannot express. For many musicians, their instruments are their voice, and the amplifiers they use are the megaphones that project their sonic expressions to the world. Among the trusted names in the realm of amplification, Blackstar has earned a stellar reputation for its exceptional sound quality and reliability.
However, even the most revered equipment can encounter challenges, and one of the most vexing issues guitarists may face is the dreaded “Blackstar Amp No Sound” problem. It’s a scenario that has left many a musician scratching their heads and, at times, their souls in despair.
But fret not, for in this comprehensive guide, we embark on a journey to unravel the mysteries behind this perplexing issue and equip you with the knowledge and solutions needed to resurrect your Blackstar amp’s voice.

Whether you’re a seasoned musician or just beginning to explore the world of amplifiers, understanding the “Blackstar Amp No Sound” issue and how to resolve it can save you time, frustration, and, most importantly, the joy of making music. So, we’ll explore the reasons behind this issue and provide you with a detailed roadmap to bring your Blackstar amp back to life, amplifying your passion and creativity once more.
# Table of Contents =>
- 1 Solutions to Fix the “Blackstar Amp No Sound” Issue –
- 1.1 1. Check for Loose Connections:
- 1.2 2. Adjust Volume and Gain Knobs:
- 1.3 3. Test with a Different Guitar and Cable:
- 1.4 4. Inspect the Speaker Cable:
- 1.5 5. Verify Footswitch & Channel Selection:
- 1.6 6. Tube Amplifiers – Replace Tubes:
- 1.7 7. Check External Effects:
- 1.8 8. Replace the Fuse:
- 1.9 Conclusion:
- 1.10 FAQs –
Reasons Behind “Blackstar Amp No Sound” Issue –
1. Cable Connections:
Start with the basics. Ensure that your guitar cable is securely plugged into both your guitar and the input jack on your Blackstar amp. Loose or damaged cables can lead to sound issues.
2. Volume and Gain Settings:
Sometimes, the most obvious solutions are the ones we overlook. Check to see if the volume and gain knobs on your amp are turned up to an audible level. It’s easy to forget to adjust them!
3. Footswitch or Channel Selection:
If your Blackstar amp features multiple channels or is equipped with a footswitch, make sure you are on the correct channel and that the footswitch is functioning correctly.
4. Speaker Cable:
Inspect the speaker cable that connects your amp to the speaker cabinet. A damaged or disconnected speaker cable can result in no sound output.
5. Mute or Standby Switch:
Some Blackstar amps come with a mute or standby switch. Verify that this switch is in the correct position to allow sound to pass through.
6. Tube Amplifiers – Check the Tubes:
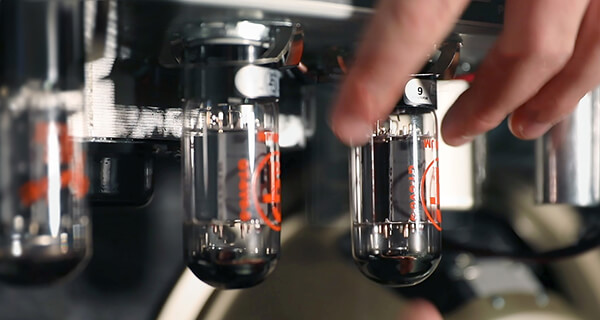
If you own a tube amplifier, the tubes can sometimes fail. Carefully examine the tubes to see if any of them have burned out or become loose. Refer to your amp’s manual for guidance on tube replacement.
7. External Effects and Pedals:
If you are using external effects pedals, check their connections and settings. A malfunctioning pedal can disrupt the signal path and lead to a “no sound” issue.
8. Fuse:
Check if the amp’s fuse has blown. If it has, replace it with the appropriate type and rating as specified in your amp’s manual.
Solutions to Fix the “Blackstar Amp No Sound” Issue –
1. Check for Loose Connections:
The first step in troubleshooting any sound issue is to inspect all cable connections, jacks, and plugs. Over time, these can become loose due to vibrations from playing or transportation. Re-seat all connections to ensure a secure fit.
2. Adjust Volume and Gain Knobs:

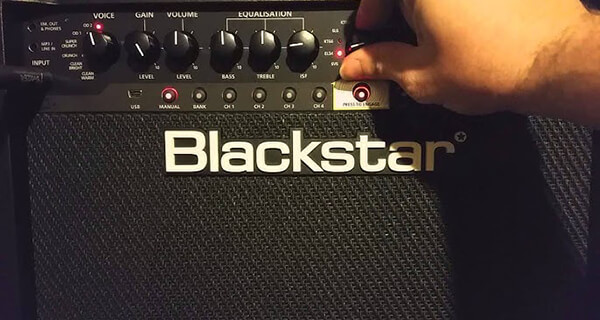
Before diving into more complex troubleshooting, start by gradually increasing the volume and gain knobs on your amp while playing your guitar. Sometimes, the issue is as simple as not having enough gain or volume dialed in.
3. Test with a Different Guitar and Cable:
To rule out the possibility of a faulty guitar or cable, try using a different guitar and cable with your Blackstar amp. If the sound returns, you may need to repair or replace your original guitar or cable.
4. Inspect the Speaker Cable:
The speaker cable connecting your amp to the speaker cabinet is crucial for sound transmission. Check that it is securely connected at both ends and is free from any visible damage. Replacing a damaged cable may be necessary.
5. Verify Footswitch & Channel Selection:
If your amplifier offers multiple channels or incorporates a footswitch, make sure you’ve selected the appropriate channel for your desired sound. Verify the footswitch’s functionality by testing it, as a malfunctioning footswitch can occasionally lead to sound-related problems.
6. Tube Amplifiers – Replace Tubes:

Tube amplifiers, while known for their warm and rich tones, require regular maintenance. If you suspect tube issues, follow these steps:
a. Power off and unplug your amp.
b. Let the amp cool down if it has been in use.
c. Consult your amp’s manual to identify the location of the tubes.
d. Carefully remove each tube one by one, taking note of its type and position.
e. Examine the tubes for indications of damage, such as a filament that has burnt out or a tube base that is loose.
f. If any tubes are damaged or burnt out, replace them with new tubes of the same type & rating. Ensure they are properly seated in their sockets.
g. Reassemble the amp and power it on. Give it some time to warm up, as tube amps need a few minutes to reach optimal operating conditions.
h. Test the amp to see if the sound has returned. If not, consult a professional technician for further diagnosis.
7. Check External Effects:
If you use external effects pedals in your setup, they can sometimes be the culprit behind sound issues. Follow these steps to troubleshoot:
a. Disconnect all external effects pedals from your signal chain.
b. Connect your guitar directly to the amp’s input jack.
c. Test the amp’s sound without any external effects. If the sound returns, reconnect each pedal one by one to identify the problematic one.
d. If a specific pedal is causing the issue, inspect its connections, power source, and settings. Clean any dirty connections or pots, and replace any malfunctioning pedals.
8. Replace the Fuse:

A blown fuse can prevent your amp from producing sound. To replace the fuse:
a. Power off and unplug your amp.
b. Locate the fuse holder, usually on the rear panel of the amp near the power cord.
c. Carefully remove the blown fuse & replace it with a new one of the same type and rating, as specified in your amp’s manual.
d. Reconnect the power cord & power on the amp.
Conclusion:
Experiencing the “Blackstar Amp No Sound” issue can be frustrating, but with patience and systematic troubleshooting, you can often identify and resolve the problem. Remember, maintaining your Blackstar amp and regularly inspecting cables, tubes, and connections can help prevent sound issues from occurring in the first place.
By following this comprehensive guide, you’ll be well-equipped to diagnose and address the “Blackstar Amp No Sound” issue and get back to making music with confidence.
FAQs –
Q: Can Blackstar amps be repaired?
A: Yes, Blackstar amps can typically be repaired. Whether it’s a minor issue like a blown fuse or a more complex problem, qualified amp technicians can diagnose and fix Blackstar amps. Seek professional assistance to maintain your amp’s exceptional sound quality.
Q: What is emulated output on a Blackstar amp?
A: The emulated output on a Blackstar amp simulates a speaker cabinet’s sound. It allows direct connections to recording gear or mixers, making it ideal for recording and live performances without needing physical miking. It also often includes tone-shaping controls for customization. Check your amp’s manual for specific options.
Last Updated on August 21, 2025 by Perry Garner


Blackstar 2 10 light goes on but as soon as i try to input a guitar cable in the jack opening the amp shorts out.